Domain Management
Sending DNS
Access Path
Domain Email -> Email Manage -> Send DNS
Automatic DNS Configuration
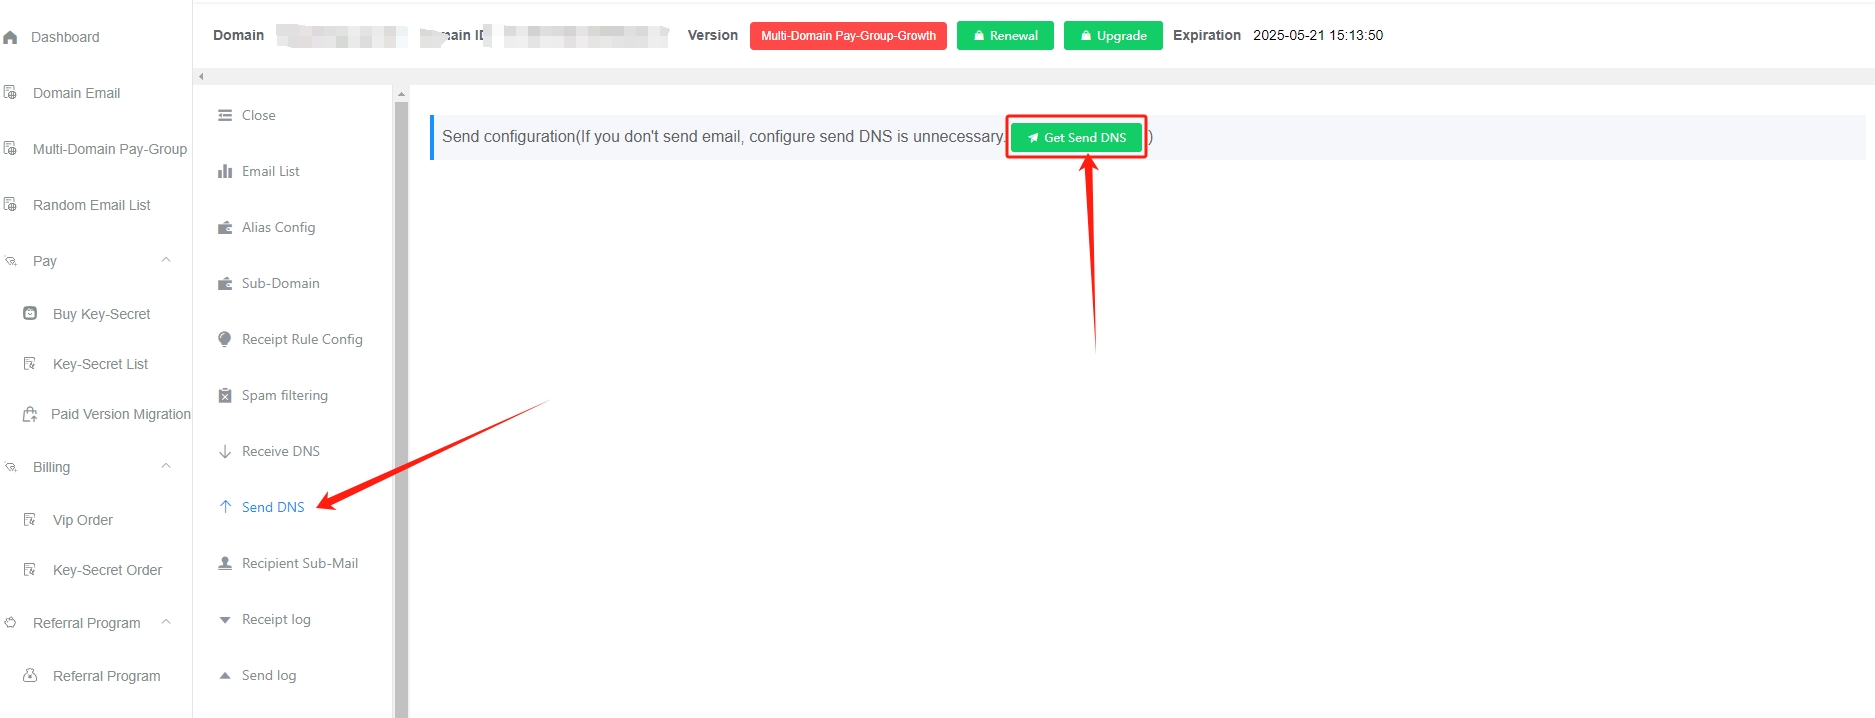
- Click the green
Get Send NDSbutton
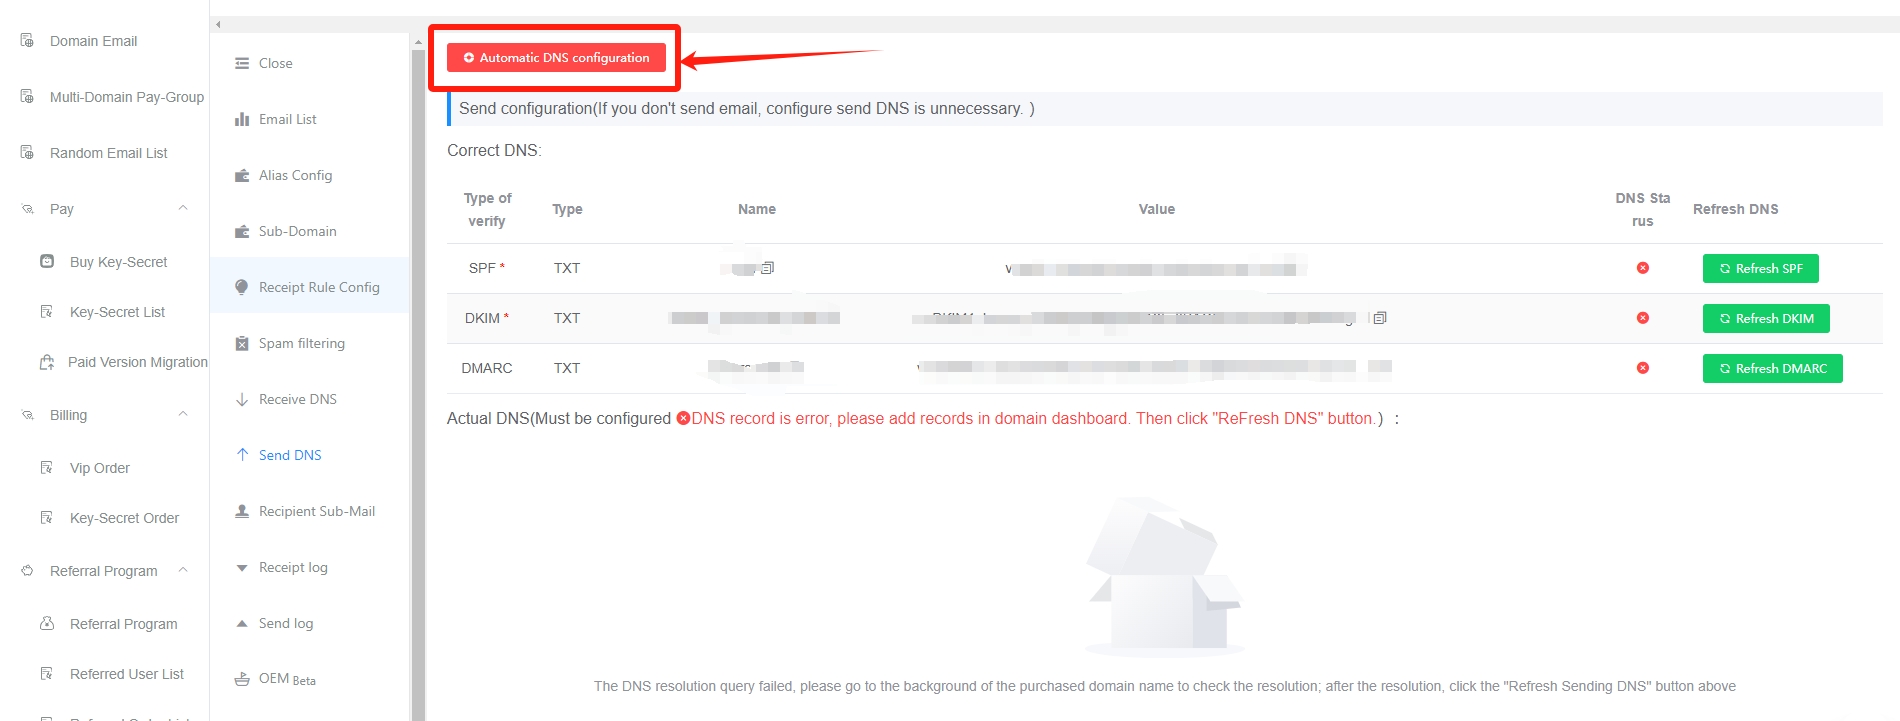
- Click the red
Automatic DNS configurationbutton
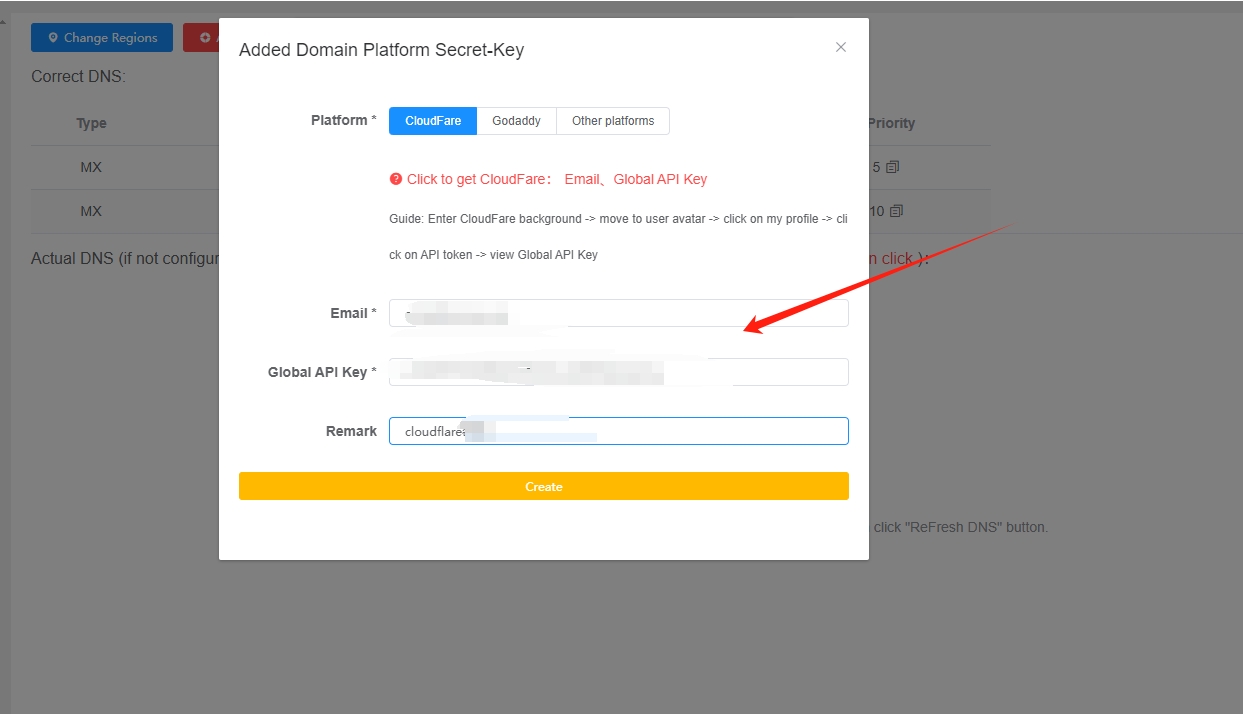
- Go to your domain platform to obtain the required private key information, then enter it in GetMX Mailbox (currently supported domain platforms: CloudFare and Godaddy)
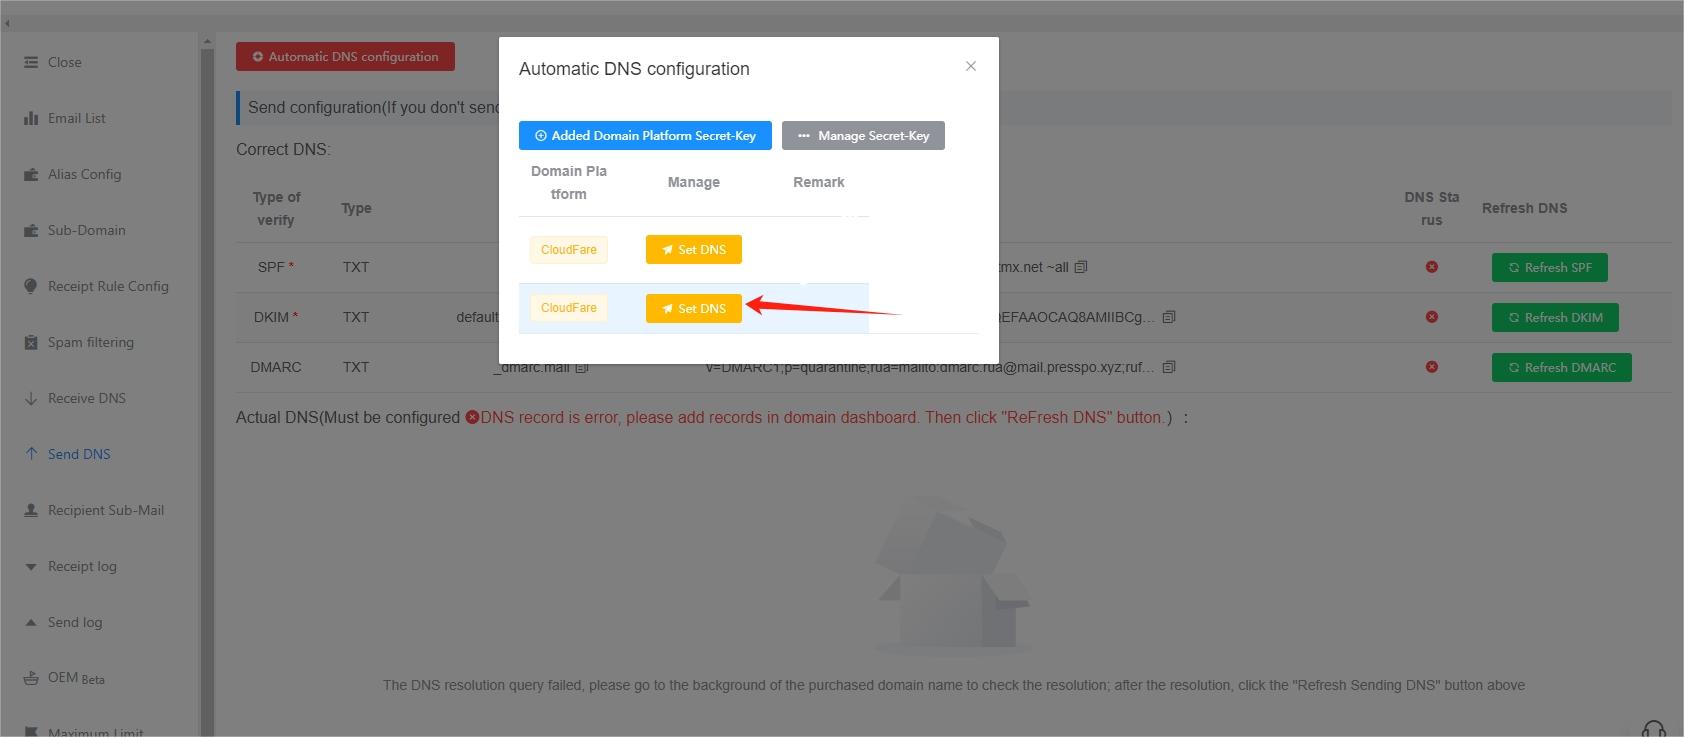
- Click the yellow
Set DNSbutton
- Click the green
Refresh DNSbutton
Manual DNS Configuration
The following uses godaddy as an example. Other platforms are largely similar. We strongly recommend using the automatic DNS configuration method above ⬆️ ⬆️ ⬆️
Important Notes
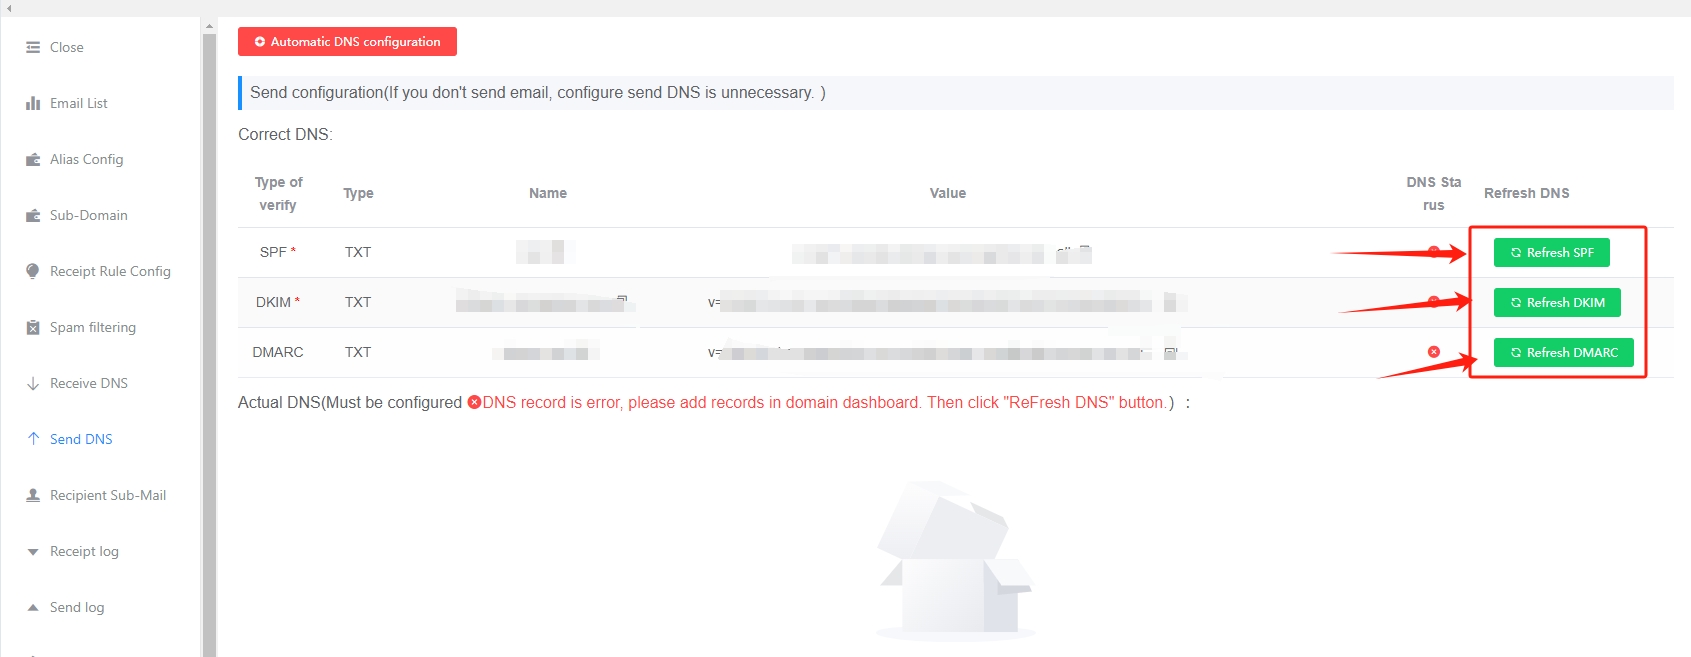
- Sending DNS must be configured and show as correct before you can send emails normally
- After configuration succeeds, click the green
Refresh SPF,Refresh DKIM, andRefresh DMARCbuttons to check whether they have taken effect - Domain DNS records are cached and do not take effect in real time. They usually take effect within half an hour, and .com domains are relatively faster. If the DNS check keeps failing, please contact customer support for troubleshooting